Start by runing to your right and enter the mission control in the PASE building
and go inside. Once you’re in there, speak to both of the controllers
and their director will come in and ask why no one has been taking care
of the astronaut who looks a bit sick. He will yell at you and you need
to click on him and select the last option “I –” and he will send you on
a mission to help out the astronaut.
Exit Mission Control and run to your left, back to where the older
man was on the stage. You’ll notice that he left behind a bottle. Pick
up the bottle of Ginger Ale and then head to your right, past Mission
Control, to the Launch Area. Stand in the middle of the elevator
scaffolding and press the elevator button to have it come down. Jump up
onto the elevator and then press the button again to zoom to the top. Be
careful not to move or jump, as it may force you off of the elevator
platform.
Once you have made it to the top, run to your right and enter the
rocket to help out the astronaut. Once you’re inside the rocket, open up
your inventory, use the Ginger Ale and you’ll make him feel better.
He’ll hand you his helmet and ask you to hold it and then close the door
behind him.
Click the headset on the right of the rocket to put it on.
Outer Space
As you hurtle toward outer space, you need to do a variety of things
you aren’t trained for, and Mission Control will guide you on what to
do. To start with, you’ll need to adjust the boosters on the bottom
right and left to both say 4150. Click and drag on the booster control,
down to decrease and up to increase. You may need to fiddle with them
for awhile before getting it right.
Next, you’ll need to switch the fuel tanks and jettison them at the
right time. The fuel tank controls are on the upper left. When the left
fuel tank is near 5%, click the little arrow pointing at the “1″ so it
points at “2″. Then, click the switch at the bottom of Fuel Tank #1
twice to make it drop off. Now, you’ll need to adjust the angle of the
ship by using the control stick in the middle. Pull it down and adjust
it until the display says 112.
The second fuel tank will start to run out of fuel. Once the fuel tank gets low, click the switch
below the second tank to release it from the ship and then sit back and
watch your journey through space.
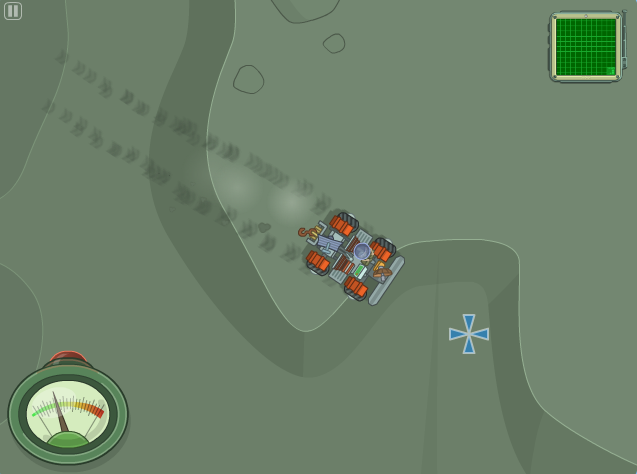
Asteroid Field
You’ll encounter an asteroid field and you’ll have to navigate your
ship through the asteroids and avoid as many of them as possible. The
ship has really great controls (move the mouse wherever you want it to
go), so it shouldn’t be terribly hard. You are allowed to bump some out
of the way if you don’t have a path to move forward.
Once you’re through the asteroid field, you’ll realize that there’s a hole in the ship that needs to be repaired.
Now,
float to your left on top of the ship and click on the panel near the
front that says “Toolkit”. This will make an orange Tool Kit box pop out —
click on it to grab it and then float to your right, back to the front
of the ship and go underneath it and head to your left.
Stay as close to the ship as you can because there are asteroids
flying around still that can knock you off balance. You should see the
air leak, so just go over to it and click on it. Your toolkit has a
putty / foam that you can use to patch up the leak. Use as much as you
need to cover the entire area and the game will eventually tell you that
you are done automatically. You’ll then go to sleep while the ship goes
on autopilot to lunar orbit around the moon.
Moon Lander
Now that we’ve entered orbit, we need to land on the moon and you
have to control the moon lander very precisely for a safe landing. The
moon lander will drop out of the rocket and start falling straight down.
The best strategy is to put your mouse just above the moon lander so
that it continues to drop straight down and then click the mouse a few
times as you go down to “boost” the ship and slow it down so you don’t
crash. After a few tries, you’ll get the hang of it.
Moon HQ
Now we are on the surface of the moon, let’s go find Salerno and
bring her back to Poptropica! Head inside and go in the first door to
enter the Vehicle Bay, jump up to the second level and check the third
locker to find the GatOS book. This is a cute play on the Spanish word
“Gato” for cat, if you notice the cover. Head out of the Vehicle Bay to
the Barracks on the right and go inside.
Climb the ladder on the right until you get to the third level. Jump
to your left and go over to the locker between bunks 7 and 8. Click the
locker to get the photo album. Then, jump up to the bed on the left to
pick up the notebook. You can read them to find out more information
about Salerno’s experience here on the Lunar Colony and also why she
doesn’t want to return home.
Run
to your right and head up the ladder to the top level. You can check
out the map to see more of Salerno’s studies, as well. Head all the way
to the left and click on the computer terminal that is on. There are a
number of emails that you can read in order to find out more about
Salerno, but it is optional.
We need administrator access to the terminal so we can open the inner
door to the Vehicle Bay, so you’ll need to use your GatOS manual to
enter the proper code to reboot the system. Refer to the picture on the
right that shows you the proper reboot code highlighted in red. Once you
press those symbols on the right side of the terminal, the system will
reboot. Then just drag the lever on the left up to open the door!
Head down the ladder and to your left to exit the Barracks and head back into the Vehicle Bay.
Now that we have the door open, we just need to power up the moon
rover. The Moon Rover is solar-powered, so you’ll need to head to the
top level of the Vehicle Bay. Once you are up top, you need to make sure
that the right side of the roof is open. If it is already open, you are
all set! If not, jump up to the top left and click the panel to open
the right side.
There are 3 reflector dishes that you will need to adjust to direct
the sunlight to the Moon Rover. The first one is on top in the middle.
Adjust it to point down at around 45 degrees. Then drop down to the next
level to your right and adjust the second reflector. Make sure that the
light from the top reflector is being directed at the second reflector
and that the second reflector is also sending off a beam of light.
Adjust it to point down, as well. Finally head down another left and to
the left to adjust the final reflector. Again, make sure light is coming
to the reflector and that it is sending off a light beam. Adjust it
down a bit and the light beam will hit the Moon Rover, giving it an
instant charge!
Jump down to the bottom level and jump into the Moon Rover — it’s
time to have some fun off-roading on the Moon! Once you get outside, you
will notice that there is a digital map on your upper-right. If you
click it, you will see that there are 3 other buildings on the Moon and
we’ll end up visiting all of them.
The first one you’ll want to visit is the Laboratory building on the
upper-right. Drive your Moon Rover to the lab.
The Lab
Once you arrive, a meteor will be blocking your path to enter the lab! Head back over to your Moon Rover and click on the hook
attached to the winch on the vehicle. Run back to your left and attach
it to the meteor. Your Moon Rover will pull the meteor out of the way
and you can head to your left and enter the lab.
As you go in, jump up to the next level right above your head and
click on the “Eye Color Changing Station” to go inside and change your
eye color. You’ll need to change them to purple so that you can
get past the retinal scanner later in the game, so go ahead and do it
now. Once you have changed your eye color, jump up to the top and toward
the middle of the building to the Pressure Chamber.
Click the “High” switch to make yourself really short and then
quickly run to your left and drop all the way to the bottom of the
building. You’ll notice two blocks stacked on top of each other with a
small space above them. Jump up and squeeze through the small space
before the Pressure Chamber effect wears off. Don’t worry, if you mess
up, you can always go back and shrink yourself again until you get it
right.
We’re almost done with this building, but now comes the hard part.
Click the door to enter the infirmary, which is actually a complicated
maze! Run to your left until you see the red hose that says “Caution: Do
not use this hose to clean out vents”. Well, we might be breaking the
rules here, but grab the hose and you’ll need to navigate the maze in a
specific pattern to get to the maintenance area.
If you don’t take the right route, you will run out of hose and have
to go back and start over. Refer to the image on the right (click to
enlarge it) so that you can make sure you have the perfect route to get
through the maze. Once you have entered the maintenance area, click on
the small vent and you will use the hose to blow the Locator Device out
of the vent system. Run over and pick it up.
Now, just head to your left a little bit and click on the “Bio Waste”
hatch to exit the Infirmary without having to go all the way back
through the maze. We’re done with the laboratory and now it’s time to
head to a new building, so run out and head to your Moon Rover!
Hydroponic Bio Dome
Now you’ll want to head to the building on the lower-left of the map,
which is a Hydroponic Bio Dome being used to grow plants on the Moon.
There’s no security on this building so head right in and you’ll notice
there’s no gravity in the building and you’ll float around. The physics
are almost identical to swimming in Poptropica, so control your
Poptropican as if they are swimming.
Head to the right and click on the Emergency Cork Dispenser. Click
the cork when it comes out — you’ll need it and a bunch more of them in a
second. Float up a little bit and you’ll see a nozzle blasting out air,
get behind the nozzle and then click on the front of the nozzle to
stick the cork in. Make sure you stay behind the nozzle, or else it will
hit you with air and knock the cork away and you’ll have to pick it up
and try again. You’ll need to go back to the Emergency Cork Dispenser
again, and then continue along your path through the trees. There will
be 5 total nozzles that you need to plug with the corks.
Once you have plugged all of the nozzles, head up into the top area
of the building. You’ll notice a figure hiding behind some of the
supplies at the top of the room. Float over and you will find Salerno,
at last! But wait, she has something to say and she doesn’t want to
return to Poptropica with you and must complete her mission to find
alien life. She’ll open up the air lock on the right and get away!
One the airlock closes behind her, you’ll notice that she drops a Key
Card on the floor in the right corner. You’ll need this to get into the
final building, which requires a retina scan, which you already have
violet / purple eyes for and a Key Card. Grab the Keycard and head back
out of the bio dome. In the “cork” room, you can float along the top to
the right so you don’t have to go through the trees again. Once you are
back in your Moon Rover, a chase scene will play out. You will
automatically chase Salerno to the final building on the upper-left of
your map.
Last building
Click on the “Eye Scan and Keycard Required” unit and after it scans
your eyes, it will let you in to the air lock. In the next room, there
are a variety of conveyor belts that you can angle up and down and
change their direction. The top control panel of each belt controls the
angle of the conveyor belt and the bottom pannel controls the direction.
Set each successive conveyor belt to point down and the direction of
travel away from you, so you can make your way all the way to the ground
floor. If you want, you can check out some of the cool experiments on
the different levels, like a Rock Granulizer, Pulverization station,
etc.
Once you are on the ground floor, run to your right and use the next
set of conveyor belts to head up to the top of the building. You’ll
finally end up on the upper-right, then click Enter to enter the door.
When you get there, you’ll realize that Salerno has “given you the slip”
and put the locator device on a robot and is nowhere to be found!
Jump up on the platform in the middle of the room and click the
sheet. One of the large metal supports will fall down to the left. Run
to your left and run along the support to the upper-left platform. Click
the sheet to reveal a Geiger Counter! This is exactly what Salerno
needs, maybe we can use it to find her!
Your Moon Rover will roll into the building. All you need to do is
get on the left of the Geiger Counter and walk toward it to push it
across the platform, down the metal support and right into your Moon
Rover. Now you’ll notice that you have a Geiger Counter display in the
lower-left of your screen. It’s already near the red, so we must be
close to what we’re looking for.
All you need to do to find the 4th alien structure is go down from
the building, slightly to the left. Go slow and use the Geiger Counter
to aid you, it’ll get more and more in the red the closer you get to the
structure. It isn’t far from the building, and you’ll see a
purple-colored X on the surface. Click it and you’ll enter the area. If
you head to your left, you will see it partially sticking out of the
ground, but it “seems buried really deep in the ground” — no problem!
Use the hook to the winch on your moon rover and you will pull the alien
structure out of the ground and a bright light will appear at the top!
Jump into your Moon Rover and follow the purple laser beam toward the
middle of the map. Go slow and follow along and you will find a point
where the purple light beam crosses a red beam. Once you are there,
click the point where they cross to enter. Run to your left and Salerno
will appear with a shovel. She’ll dig a few times and you will fall
under the surface of the Moon together!
Run all the way to the right, and click on the switch with the alien
handprint in front of the pink light. This will open up a portal to an
alien world and Salerno will decide to go through the portal. Mission
Control will bring you back to Poptropica and everyone will be sad that
they’ll never hear from Salerno again. Just as you are about to leave,
there will be an incoming message from SETI from Salerno showing
everyone proof that there is an alien civilization!
The Director of PASE will come in and award you with the medal.
Bonus Quest Walkthrough
The Bonus Quest will begin with a bunch of messages coming from the
alien planet from Salerno, but no one can decode them. The scientists
will send you to a retirement community to find Alan Turing, the
inventor of the Turing test. Head out of Mission Control and run to your
left, past the stage and the beginning of the island.
You’ll notice that there’s a bus what wasn’t there before. Click it
to get in and go to the Shady Pines Retirement Village. Click the buzzer
to enter the building and there will be a list of residents, none of
which is Alan Turing. Of course, his is in code! It is always apartment
number 3A, so go down to the second to last one (3A) and click the
letters on the name to rearrange them until it says “ALAN TURING”.
Once you’ve done that click the 3A button and Alan Turing will come
out of the retirement village and return to mission control with you so
that you can decode the transmissions. He’ll give you a tutorial on how
to solve the code, and the solution is actually quite easy and
surprisingly repetitive and dull because the code solution is always the
same each time and you have to do it four times in a row. Just slide
to each letter and place them in the grid as shown in the picture below.
Put the letters in this order four times and you will win the Bonus Quest!
By
Poptropuca Cheatz
Edited by Fuzzy-B


